How to Frame Watercolor Paintings

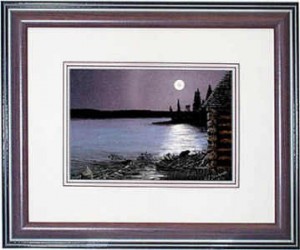
Framing a watercolor painting is different from framing an oil painting on canvas. Know the purpose why you‘re framing your artwork and that is to display it in the best way and to protect it with a frame, mat and glass. Here are some easy steps and tips on how you can frame your own watercolor painting.

Framed02

Materials
Aside from glass, you need to protect the painting with a mat and backing (usually foam core), which should be acid free and archival, to prevent your painting from turning yellow overtime. Use a double mat because it looks better. You also need some acid-free cloth tape to attach the painting to the mat. The mat keeps the painting from touching the glass, which is very important. If you opt not to use a mat, then you need to put a spacer between the glass and the painting so they don’t touch.


Sizing
You have three options for acquiring mats and frames. The cheapest way is to buy a pre-cut mat and pre-made frame. Alternatively, you can purchase the equipment to cut your own mats, and even buy parts to assemble your own frames. Eventually you can save money by cutting your own mats, if you do enough of them, although I’ve found the mat material to be expensive unless bought in bulk. Finally, you can simply order what you need from a framer.

Frame
Finally, you need a frame. In general, the larger the painting, the wider the frame molding can be, but it’s all a matter of taste. Do, however, consider how the end result will look when you’re selecting molding. You don’t want to either overwhelm or underwhelm the artwork.

WatercolorFrameAssembly
Now that you have everything you need to frame your painting, you can now start assembling. Here’s how.
1. Wipe glass and make sure not to leave finger prints before placing in the frame.
2. Prepare you pre-cut mat and you can stack them inside the frame since they are thin. You can triple or double the matting with different colors if you want.
3. Surface could be plain paper, linen, silk, even leather, rice paper, can be textured and patterned.
4. Most mats are only available with a white core (the tiny part that shows when a bevel opening is cut). But a handful of mats do come with black core, green, red and yellow.
5. A common form of decoration on non cloth mats is the “French Line” or “French Panel”. These are lines drawn in ink or paint forming a rectangle around the opening. Could have several lines.
6. It is best to buy Acid Free mats. An acidic mat will fade and leak into the art work, causing “mat burn”, light brown marks.
7. So you have the matt, now attach picture with non acid tape to the mat. Place on glass.
8. Put the foam board, hold in place with framing points (look like small metal arrows).
9. Turn over, look at art work before inserting point in frame and across top of the foam board.
10. Lay the paper back attached to back of frame covering top to bottom, side to side (called dust cover).
11. Drive in fastners into back of frame, about 1/3rd down from top. String wire between fastners.

Image source: www.mimenta.com
Best Restaurants for Art Lovers

casa_lever

Dining establishments are now incorporating art in their décor to showcase their collections and to also entice customers. Aside from offering delicious food, these restaurants and cafés also serve as art galleries, displaying paintings on canvas, sculptures, and other artworks. If you’re an artist, or an art lover, check out these restaurants:

Casa Lever, New York. Casa Lever is a fine dining restaurant in Manhattan which displays modern art. Several portraits of celebrities created by Andy Warhol grace the walls of this restaurant. The portraits include Sylvester Stallone, Aretha Franklin, and Giorgio Armani.

Four Seasons Restaurant, New York. Four Seasons Restaurant displays changing galleries of Modern Art, including artworks from Andy Warhol, Jackson Pollock, and Helen Frankenthaler. There’s an interesting story about American artist Mark Rothko. Rothko was commissioned to create a series paintings for the dining rooms. He created the paintings with “malicious intentions” but then decided to return the advance payment and kept his paintings for himself.

The Leopard at des Artistes, New York. The Leopard is an Italian fine dining restaurant in New York. The dining area displays the six panels of wood nypmhs and paintings by American artist Howard Chandler Christy which includes The Parrot Girl, The Swing Girl, and  Fountain of Youth.

Tru, Chicago. The interiors of Tru looks like an art gallery, with its high ceilings, pin-spot lights, and white walls. It displays pieces from some of the best 20th century artists such as the King of the Pop Artists Andy Warhol, American geometric painter Peter Halley, and German abstract painter Gerhard Richter.

L’Escargot, London. Opened in 1927, L’Escargot houses an extensive collection of original artworks by some of the famous artists in the 20th century such as French painter Henri Matisse, English painter David Hockney, Spanish painter & sculptor Joan Miró, and Russian artist Marc Chagall.

Maxim’s, Paris. Maxim’s is famous for its Art Nouveau interior decor. It displays an extensive collection of illustrious masterpieces from the Belle Epoch. Maxim’s display more than 500 original, signed pieces from all over the world.

La Colombe d’Or, St. Paul de Vence, France. La Colombe d’Or is a hotel and restaurant located in an old medieval town in France. Paul Roux started it as a café bar in 1920 and then later opened an inn which attracted artists from neighbor towns. Many paintings now grace the walls of the restaurant since artists such as Pablo Picasso and Henri Matisse who were frequent customers exchanged their works as payment for meals or their stay.

Image source: www.casalever.com

Tips for Watercolor Painters: Brush Skills Part Two

painterlyPainterly Strokes
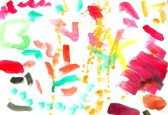
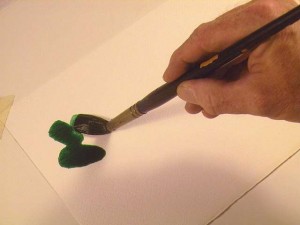
Dab an old #12 Serie 7 Winsor & Newton round red sable on a paint color and start by laying the full brush on the paper and lifting away cleanly. Try more short dabbing strokes across your paper. Rinse your brush and change colors. Keep your brush strokes uniform in width as you start to overlap strokes to develop shapes. Play with different groupings of brush strokes across your paper. Use as many color as you please. Continue laying down similar brush strokes trying different angles of attack. Allow your wet brush strokes to intermingle as you progress.

stabThe Stab
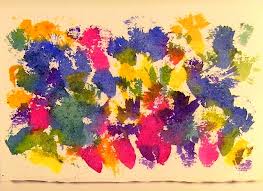
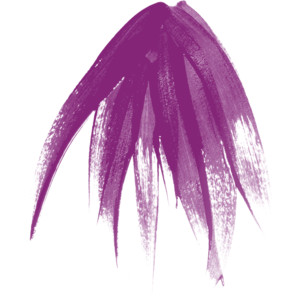
Start by dipping your brush into a color you want and gently poke or stab your brush into the paper. The effect that you want to see after doing this is to see a fanning pattern of the hairs as you push it into the paper. Continue doing this on your paper, adding some twist or spin to your stroke by rolling your brush in your fingers as you paint. Experiment with angles of attack to find the best spreading point for the brush you are using. Consciously try to shape the hairs as you press a stroke into the paper. Give it a little wiggle while the brush hairs rest on the paper to make them align. Rinse and switch colors and/or brushes. Continue to practice spreading and twisting your brush, building texture across the paper. Look for organic shapes and textures as you allow your strokes and colors to overlap and blend. This is another example of a what is considered a painterly stroke.

cutCutting Edges
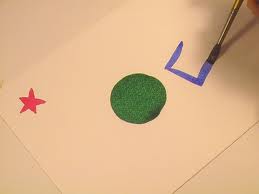
“Cutting an edge” is a sign painter’s term for pulling a clean line of paint with your brush. A clean line being a line that is smooth and flowing with no irregularities. Consider each shape before you start to paint. You may lightly doodle the shapes first before painting. A round #8 Grumbacher Watercolor Classic red sable brush can be used in larger shapes a round #4 Kolonok 1001 Series Kolinsky sable for smaller shapes. If your brush is too full to get a proper point, touch it on a sponge, tissue, or towel to remove excess paint before you start. While you have one color in your brush try painting all the different shapes across the page in that one color. Rinse your brush out, switch colors, and repeat. For sharp corners use the very tip of your brush and start the brush stroke at the corner point of the shape. For circular shapes, start your curving brush stroke inside the edge of the shape and pull the stroke into position before continuing the stroke. Switch to a smaller brush and try some mini shapes.

Stuck in a Rut? 5 Ways to Get Inspired to Paint

inspiration

There are times in an artist’s life when he feels uninspired, unmotivated, and uncreative. It’s like there’s a creative lull, especially after finishing a major artwork. You feel like you’ll never be able to create another beautiful painting again, you’re tired of picking up your paintbrush and starting your first stroke on the canvas, you have no inspiration to work on. If you are in this phase, here are some ways which can help you get out of the creative block you’re experiencing.

1. Look around you to get inspiration. Get out of your studio and take a walk. Be conscious of your surroundings. Notice the things around you. Look with a fresh new perspective of your environment. Sometimes, because an object, a person, or an event is ordinary to you, you may not take notice of it. You’ll be surprised how simple, ordinary things around you can give you inspiration on your next painting. You’ll be able to express yourself more accurately if your subject is something which you can relate to, or something that you are familiar with.

2. Work on more than one painting at a time. This technique seems absurd. You are uncreative yet I’m suggesting you to work on two paintings. A painting, especially if it’s big-scale, can drain your creative juices in the long run. Working on the same project everyday can be a bit tiresome and tedious. To sort of “spice up” your painting sessions, try doing two paintings. If you’re finished with an area or element in the first painting and you’re feeling tired, you can then switch to the second painting. This allows you to rest your mind from the first painting and when you come back to it, you will see areas which you can improve and enhance.

3. Experiment with a different painting technique or medium. Humans are creatures of habit. We want to do the same things in the same way. If you’re feeling uninspired, try to create a new habit in painting. Learn a new painting style and start using it. This may be a trial and error exercise for you but as you go along, you’ll improve and hopefully, master this new painting style. It can even be your new signature style in your paintings. If you’re always working with oil paints, try using watercolors or pastels. Different media require different treatments, brush strokes, and handling. You may have to learn more about a new medium that you want to work on and studying about it may give you the motivation to start painting again.

4. Look at the artworks of other painters. Art galleries, museums, and art exhibitions showcase numerous paintings and other artworks. Seeing the creativity of other artists can also inspire you to do your own masterpiece. Look at the Internet for paintings done by famous artists and see if you can learn a thing or two about how use the same painting technique or materials in your own project. Check out art magazines to see what subjects are popular nowadays, who are the upcoming artists, or where you can get art lessons.

5. Meet with other artists. Get together with your art friends. If all of you are busy, schedule an appointment that all of you will keep. This is when you can share your ideas, frustrations, tips, problems, etc. Discussing with your art buddies can help you get fresh ideas, be motivated and refreshed. After a lunch or coffee with friends, you may find yourself filled with enthusiasm and eagerness to create another beautiful artwork.

Image source: www.thecreativecomplex.com

Tips for Watercolor Painters: Brush Skills Part One

Practice makes perfect. Every skill that we learn is perfected through constant practice until we perfect them and becomes a second nature to us. Aside from being a talent, painting is a skill that needs to be honed and mastered. Other more experienced watercolor artists have developed different techniques that created their masterpieces that we can also use and here are some of them.

band of colorsBands of Color
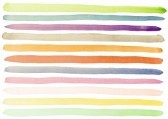
Dip your watercolor brush into a color until loaded and start to paint a continuous wavy pattern across the paper. Keep the width of the strokes equal as much as possible. Add more paint to your brush as needed and continue where you left off until you reach the end of the paper. Rinse your brush and dip it in another color. Make another wavy line right next to the first one but make sure not to let the washes touch. Leave white paper between each stroke. Continue doing this until you fill the whole paper.

thick and thinThick and Thin
Choose a color or a combination of colors. Dip your brush into the paint and make sure it’s not too wet. Start a fine line using the tip of the brush first then start putting pressure on the brush to make a thicker stroke then lessen the pressure until the line thins out again. Do this without lifting the brush off the paper. Reload your paint brush as needed. Rinse your brush and use other colors to make more lines using the same technique until you fill the paper. You can try to thicken your stroke where the adjacent line is thin, but in particluar, avoid touching the other washes with the new colors you lay down. Being able to instinctively thicken or thin a brush stroke on command while you are painting, and have it go where you want it, is a good preparation for your future masterpieces.

flickWrist Flick
The Wrist Flick is easily done with a decent round red sable or a rigger-style brush. Put paint in you brush and position the tip of the brush pointing towards you. Push the brush tip upward with a flicking motion creating a feathery point at the last part of the stroke. One technique that you can use is you can rest your brush hand on top of my other hand for stability and control of detailed flick strokes. Practice several times in each color you have. Vary the thickness of the strokes as you try to imitate grasses, branches, or even feathers.

There are more of these techniques. Watch out for par two!

5 Tips in Buying an Artist’s Easel

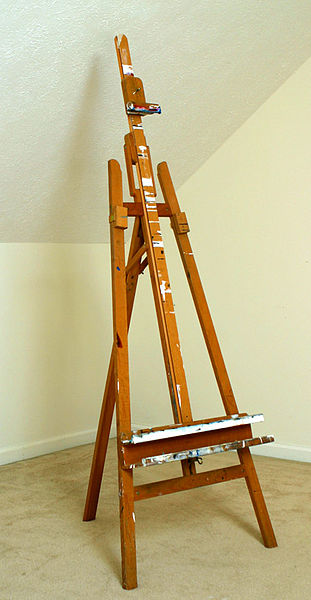
311px-Tripod_easelIn a previous blog post, I explained the different types of easels available to painters. With a wide range of easels out there, how do you choose the easel for you? Here are tips to help you in selecting the perfect easel:

Tip #1. Ask these questions to yourself:

  • What kind of painting do I always do?
  • What medium am I using?
  • What is my budget for an easel?
  • Where will I place and store the easel? Do I have adequate space?
  • Where do I usually do my paintings? Inside a studio or outdoors?

Your answers to these questions will help you decide on which easel is best for you. A tabletop easel is best if you like to paint small-scale paintings or you have very limited space in your room. Different medium require different easels. For example, if you paint with oils, use an A-frame or H-frame easel, or whatever easel that will provide you with a vertical working surface. If you use several medium such as oils and watercolors, a convertible easel is best. Aside from these factors, the budget and space should also be considered.

Tip #2. Check the sturdiness of the easel. The easel should be sturdy enough to hold your canvas, support the painting process, and will not easily topple. The larger the canvas you’re working on, the sturdier the easel should be. You wouldn’t want to work on a shaky surface wherein each brush strokes vibrate because the easel cannot give ample support. Make sure that you’re not buying a display easel which is lightweight and spindly. It is designed for showcasing paintings, and not for working on paintings.

Tip #3. Choose an easel that offers adjustability. Buy an easel which provides the greatest degree of adjustability. When painting, you may want to paint standing up or sitting down, you need to work on top of the canvas as well as at the bottom. You need to have an easel that can be adjusted to give you the right tilt so you can paint on different areas of the canvas.

Tip #4. Look for an easy-to-use easel. This tip is related to Tip #3. Check if you can easily use the screw and bolt mechanism of the easel. See if it tightens properly according to the height and angle you preferred.

Tip #5. Save money for a quality easel. Keep in mind that an easel is one of your biggest expense in painting. You may have to wait for some time and keep saving for a high quality easel rather than buying cheap easels. You will be using an easel for a long time so it’s better to buy an easel that would last.

Watercolor Paintings by Vincent Van Gogh

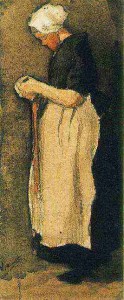
Scheveningen Woman Etten: November-December, 1881 (Amsterdam, Van Gogh Museum)
Scheveningen Woman
Etten: November-December, 1881
(Amsterdam, Van Gogh Museum)

“What a splendid thing watercolour is to express atmosphere and distance, so that the figure is surrounded by air and can breathe in it, as it were.” – Vincent van Gogh

Although Van Gogh’s watercolour paintings are not as well known as his oil paintings, he produced 148 watercolor paintings during his life and perfected this skill. His fondness in watercolour are very evident through his letters to his brother Theo. At the age of 28 Vincent wrote the following in a letter to his brother Theo in December 1888:

“I came away from him with some painted studies and a few watercolors. They are not masterpieces, of course, yet I really believe that there is some soundness and truth in them, more at any rate than what I’ve done up to now. And so I reckon that I am now at the beginning of the beginning of doing something serious. And because I can now call on a couple of technical resources, that is to say, paint and brush, everything seems fresh again, as it were.”

In the same letter he wrote:

“I wish you could see the two watercolors I have brought back with me, for you would realize that they are watercolors just like any other watercolours. They may still be full of imperfections, que soit, I am the first to say that I am still very dissatisfied with them, and yet they are quite different from what I have done before and look fresher and brighter. That doesn’t alter the fact, however, that they must get fresher and brighter still, but one can’t do everything one wants just like that. It will come little by little.”

Aside from drawing, Van Gogh often did watercolors as studies before doing an oil painting or as practice. Though often lacking his distinctive brush stroke textures, the watercolors are unmistakably Van Gogh in their use of bold, vibrant color. Often times, these watercolors were used as field studies for their eventual larger oil counterparts.

Initially, van Gogh would use watercolors to add shades to his drawings but the more he used them, the more these pieces became works of art in their own right. As Van Gogh continued to refine his technique, he used more and brighter colors in his watercolors. Over time he became more comfortable working with watercolors and was able to work quickly with them to produce more impressive works.

The watercolor paintings of Van Gohg distinguish themselves as a vibrant and important part of his overall oeuvre. Vincent Van Gogh‘s use of colour is, as always, marvelous and his watercolour works stand out as a remarkable achievement in the course of his constantly evolving art.

Image source:  www.vangoghgallery.com

Beautiful Paintings Using Painting Knives

Tired of using paintbrushes? Want to experiment on using other tools in painting? You can try using a painting knife. People confuse a painting knife with a palette knife, the terms are used interchangeably, but when applying paint on a canvas, painting knife is used. Palette knife is used to mix and blend paint colors.

Using a painting knife produces thick, textured art work which is great for creating impasto. Impasto is a painting technique, using a thick application of paint that makes no attempt to look smooth. Most of the times, oil paint is the medium used in knife painting because of its think consistency but acrylics can also be used.

Knife painting can be a liberating technique. It lets you play with paint using the knife to create different depth and texture to the canvas. You need to load more paint that you normally need to the painting knife. You can then rub, squish, scrape, whip, slice, dab, mix the paint and let it sit there on the canvas. Many abstract and impressionist painters use painting knives in painting such as Vincent van Gogh, Willem de Kooning, Hans Hofmann, and contemporary artists Frank Auerbach and Leonid Afremov. Most common subjects in knife painting include architectural structures, landscapes, and man-made objects.

If you’re looking at a painting and you’re not sure whether the impasto technique was used, look at the painting from the side. If you see lumps of paint on the canvas, you’ll be sure that impasto was used.

Here are some beautiful paintings which used painting knives:

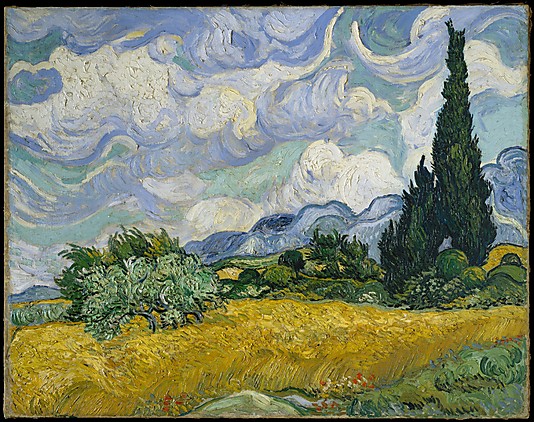
Wheat Field with Cypresses_Van_Gogh
Wheat Field with Cypresses by Vincent van Gogh, 1889.

Vincent van Gogh created several paintings in his Wheat Fields series. In the painting above, notice the movements of the clouds, trees, and the wheat field. Van Gogh used the impasto technique in this painting, and all the paintings in the series. He used bright, vivid paint colors to convey energy and movement.

Farewell_to_Anger_Afremov
Farewell to Anger by Leonid Afremov

Leonid Afremov is a Russian-Israeli modern impressionistic artist known for his use of painting knives in his artworks. He is also known as a self-promoting artist, using the Internet to promote and sell his paintings and not much relying on art galleries and exhibitions. In his paintings, you will see how he effectively used the knife in applying, mixing, and creating images. He was able to develop a painting style distinctly his own.

Image sources:
www.metmuseum.org
www.afremov.com

Watercolor Painting Supplies for Beginners

Watercolor is one of the most versatile mediums to work with that you can paint your subjects from very controlled and detailed, to very loose and impressionistic. It is exciting and enjoyable but challenging and a bit frustrating at the same time. Now that you’ve decided that you want to try watercolor as a medium, you need to start somewhere and that is to know your materials.

watercolor

Paper
Watercolor paper is essentially blotting paper marketed and sold as an art paper, and the two can be used interchangeably, as watercolor paper is more easily obtainable than blotter and can be used as a substitute for blotter. Lower end watercolor papers can resemble heavy paper more while higher end varieties are usually entirely cotton and more porous like blotter. Watercolor paper is traditionally torn and not cut.

Paint
Watercolor paint consists of four principal ingredients: pigments, gum Arabic, additives and solvent. The term watercolor refers to paints that use water soluble, complex carbohydrates as a binder. Originally (16th to 18th centuries), watercolor binders were sugars and/or hide glues, but since the 19th century the preferred binder is natural gum arabic, with glycerin and/or honey as additives to improve plasticity and dissolvability of the binder, and with other chemicals added to improve product shelf life.

Palette
Cake and Pan watercolor sets usually have built-in fold out palettes that are useable in varying degrees depending on their size and orientation. For your tube watercolors you can use a flat white dinner plate or buy some inexpensive 6 or more welled plastic palettes like the ones you used in grade school for your tempera paints. A covered plastic palette makes for the least waste and most convenience if you are using tube watercolors. If you are getting serious, buy one.

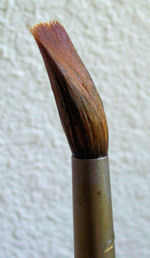
Brushes-water-bent-150258Brush
A #8 round red sable watercolor brush is the best beginner brush to buy most especially when you can afford only one brush. Adding a round #4 and a 1″ flat would come in handy for detail work and large washes. Most manufacturers have starter sets that contain very usable equivalents.

Water
Find a glass or jar, or small bucket to hold fresh, clean water. Use two for rinsing your brush between colors, and for clean water for painting. Avoid hard water for it decreases paint solubility and flow. Tap water is usually fine

Extras
Some minor extra things that you will need in you watercolour kit is a pencil, a kneaded eraser, some tissues, and an old towel or paper towels, and a couple of large metal clips for holding your watercolor paper to a board.

Image source: watercolorpainting.com

Painting Knife vs. Palette Knife: What’s the Difference?

Many people are confused between a painting knife and a palette knife. They look similar and are used in painting on canvas. So, what’s the difference between these two painting tools?

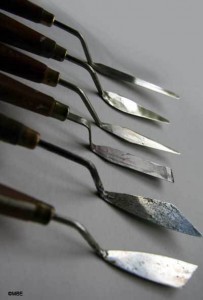
Knife-Painting-shapes2
Different shapes of painting knives

Painting Knife
About.com defines a painting knife as “a springy, shaped, metal spatula used for painting instead of a brush.” A painting knife is a tool used to apply paint which is made of metal with a wooden handle. It has a  crank or a bend on the handle, similar to the shape of a trowel, that helps keep your knuckles from touching the paint you’re applying. Eventhough it’s called a knife, a painting knife has blunt edges and is not used for cutting or slicing. Painting knives are available in different sizes and angular shapes: triangular, pear-shaped, rectangular, or diamond-like.

How to buy a painting knife
When buying a painting knife, choose the one with a flexible blade, one which has a good spring to it. The handle should be smooth, has a nice grip, and comfortable to hold. Make sure that the handle and the blade are firmly attached to avoid wasting paint or accidents.

How to use a painting knife
Using a painting knife is easy, just like spreading butter on sliced bread. Get some paint from your palette and spread the paint on the canvas. You can use both sides of the painting knife.

How to clean a painting knife
After using a painting knife, use a clean cloth to wipe off the paint. Use another cloth to completely clean the tool. If the paint has already dried, scrape off the paint using a blunt knife and a damp cloth. A painting knife with a stainless steel blade is more forgiving if you forgot to clean it immediately after painting. However, if the blade is made of steel, it is prone to rust if neglected.

Palette_knife
Palette knife

Palette Knife
A palette knife is a blunt tool shaped like a spatula which is used in mixing paint colors, mediums, additives, etc. and scraping paint off the palette. It has a longer, straight blade with a rounded tip, unlike a painting knife which has angular shapes. A palette knife is made of metal, plastic, or wood.

How to buy a palette knife
Choose a palette knife with a metal blade and wood handle. As much as possible, avoid a plastic palette knife since it breaks easily. It may be inexpensive than a professional palette knife, but if you are planning to use this tool for a long time, go with the metal one which is sturdier and can effectively do the work.

How to use a palette knife
Put the paint colors or pigments on your palette. With a palette knife, get a little paint from the colors that you want to blend. Dab, flatten, and mix the colors together. If you are adding another color to the blended paints, clean the palette knife first using a cloth before getting the third paint color.

How to clean a palette knife
Cleaning a palette knife is similar to a painting knife. Use a damp cloth to remove the paint from the palette knife.

Image sources:
www.about.com
www.wikipedia.org